LIGHT LINE · COMPACT COIL
Most wrapped knots creep down to the eye one turn at a time, and you’re left guessing whether they finished. A correctly closed Pitzen doesn’t make you guess. It arrives all at once: the tag makes a short coil, returns through the loop at the top, and the wrap package drops onto the eye as one piece. Stiff heavy leader is a poor fit for that structure.
Find the top loop before you start wrapping
Lighter mono, fluorocarbon, and fly tippet.
Stiff, heavy line fights the collapse. The San Diego Jam carries similar logic into heavier line and braid.
A snug terminal connection to fly, hook, lure, or small hardware.
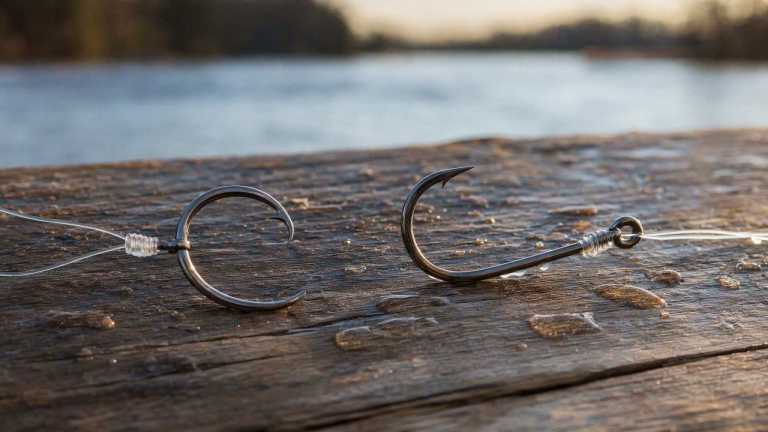
A short even coil with the tag locked through the top loop — or, on the wrong material, a coil that just sits there refusing to close.
The lock sits above the coil, not beside the eye
The tag makes several turns around the standing line, then comes back through the small loop at the top of the wrap package. Pull the standing line and the whole coil collapses toward the hardware. On light tackle that small footprint is the entire appeal. Stiff leader is a different story: it can flat-out refuse to collapse, and being patient with it doesn’t change the answer.
Loop first, then wrap away from the eye
- Pass the line through the eye and bring the tag back up alongside the standing line.
- Hook the line over a fingertip to hold a small loop at the top, away from the eye.
- Wind the tag back down around both parallel lines, about four turns, working toward the eye.
- Pass the tag back up through the small loop still sitting on your fingertip.
- Moisten it and tighten the coil onto the standing line, then slide it down to the eye with your fingers rather than by hauling on the main line.
- Check the coil alignment and pull-test before you trim.
When it won’t seat
Stiff line resists the collapse, and that’s the usual culprit when the knot won’t seat cleanly. Coils can also stack over each other instead of lying side by side, or the tag can miss the top loop on its way back. Jerking it tight burns fluorocarbon. Pull slow and steady and wait to feel the coil arrive. If a heavy leader won’t close after a couple of honest tries, stop blaming your fingers and grab lighter tippet or a different knot.
A tippet-weight knot, and it knows it
Use: light mono, fluoro, or tippet terminal connections. Skip: heavy leader or braid. Compare: San Diego Jam for heavier, all-line work; Orvis and Clinch for other light terminal choices.
HOW I CHECK THIS ONE
The video worth watching is the one that shows the coil seating
I watch for the little pop when the coil collapses, because that’s the tell that it seated right, not just that it looks tied. NetKnots — Pitzen Knot animation · RIO Products / InTheRiffle — Pitzen Knot (with strength test) · RIO Products — Pitzen Knot short film
The RIO demos show the seating pop and the V-shape a correct Pitzen (also called the 16-20 or Eugene Bend) should have, and that’s the thing to hold your own knot up against.
Open the deeper knot workflowJob, material, route, dressing, seating, pull-test checks and the standardized comparison record.
THE SIX-MOVE CHECK
Job → Material → Route → Dress → Seat → Test
- Job. Name what the connection has to do before choosing the knot.
- Material. Confirm the line, leader, rope, wire, and hardware actually suit this structure.
- Route. Trace every pass before tightening anything.
- Dress. Put strands, wraps, and loops in their intended order with no accidental crossings.
- Seat. Tighten in the order this knot needs. More force does not repair bad geometry.
- Test. Inspect the finished shape, load it by hand when appropriate, and retie if anything moves or fails the article-specific checks.
Practice / pass test. Tie this knot three clean times without rushing. A tie passes only when it matches this article’s What to check before you trust it geometry, shows none of the listed failure clues, and survives the stated load/inspection test. If you cannot tell why one attempt is better than another, keep practicing—the lesson is recognition, not memorization.
KNOT SPEC
Pitzen Knot — the short answers
- ALSO CALLED
- Pitzen Knot. Also called the Eugene Bend, and often listed as the 16-20 Knot after the tippet and hook sizes it was popularized on. Attributed to Edgar Pitzenbauer. Best known among fly anglers and light-line spin anglers.
- KNOT TYPE
- Terminal knot, short coil locked through an upper loop
- WHAT IT CONNECTS
- Light line to fly, hook, lure or small hardware. Not a line-to-line knot, not a loop knot, and not a heavy-leader connection.
- LINE TYPES
- Lighter monofilament, fluorocarbon and fly tippet. Stiff heavy leader resists the collapse that makes the knot work. Not for braid, not for wire, not tied in fly line.
- STRENGTH BAND
- High on light line when it collapses properly, and unreliable outside that range. The band is conditional: it is a strong knot in the diameters it was built for, and on stiff heavy leader it is not a strength knot at all because it never fully seats.
- DIFFICULTY
- Intermediate. The wrapping is easy; recognizing whether the coil actually collapsed is the skill. Kids manage the movements, but judging a good seat takes a few sessions of feeling the knot arrive.
- STEPS AND WRAPS
- Six moves with a real wrap count — a short coil of turns around the standing line, moving away from the eye, then the tag back through the loop at the top. No braid variant, because braid is not a material for it.
- TIE TIME
- Fast for a wrapped knot once learned. Twenty to thirty seconds, with most of that spent on the seating pull, which cannot be hurried.
- POOR CONDITIONS
- Reasonable in wind and current. Cold hands make the coil harder to keep even, and low light hides the top loop, which is the one thing you must find on the return. It is not a knot to learn in the dark.
- THROUGH THE GUIDES
- Very compact when it seats — a short coil rather than a long barrel — so it clears guides cleanly and does not disturb how a small fly rides.
- LUBRICATION
- Yes, and here it does two jobs. Lubrication protects the line, and it also lets the coil slide down and collapse onto the eye as one package instead of creeping turn by turn.
- TAG END
- Leave enough to make the coil comfortably, then trim close after testing. If the tag runs off alongside the standing line rather than locking at the top edge, the knot is wrong and the tag length is not the issue.
- TOOLS
- None. Nippers to trim, and magnification on the smallest hooks. Nothing else improves it.
- BEST SUITED TO
- Trout and grayling on the fly, plus light freshwater spin work for panfish and small bass. Chosen by line diameter more than by species — light line is the whole condition.
The strength bands are rough on purpose. Published knot tests don’t agree with each other — the same braid-to-leader knot has tested near ninety percent of line strength on one machine and under half on another, because the line brand, its diameter, how fast it got cinched, whether it was wet and whose hands tied it all move the number more than the knot does. Use the band to compare this knot with the others, not as a number to quote.
LIGHT DIAMETERS ONLY
On fine tippet the coil arrives as one piece you can feel seat, and a small fly is left nothing to tow. Ask it to close on stiff heavy leader and it simply will not, and no amount of patience changes that.
Advantages
- Collapses into a short, tidy package, so a small fly is not towing a long terminal barrel.
- Gives a clear tactile signal when it seats — the coil arrives as one piece, and you can feel it.
- Strong on the light diameters it was designed around, which is where many terminal knots lose ground.
- Uses relatively little line per tie, which matters on a tippet you are shortening all day.
Disadvantages
- Refuses to close properly on stiff or heavy leader, and no amount of patience fixes that.
- Coils can stack over each other instead of lying side by side, which weakens the knot invisibly.
- The tag has to find the top loop on the return, and missing it is easy in poor light.
- It has a wrap count, so it is one more thing to get right when you are cold and rushed.
- Not usable on braid, so it does not carry over to braid-based tackle.
Use a different knot when
- San Diego Jam — when the line is heavier or stiffer than the Pitzen will collapse on, or you are on braid
- Orvis Knot — when you want one compact mono and fluoro knot with a wider working range
- Improved Clinch — when you want the familiar spiral and can accept a longer knot behind the eye
- Davy or Double Davy — when the fly is very small and you want even less mass at the nose
WHAT TO CHECK BEFORE YOU TRUST IT
The Pitzen belongs on light line, and the reason to know it is the seating signal. A correct one does not creep down one turn at a time; the whole coil collapses onto the eye at once, and you feel it arrive. That makes it one of the few knots that tells you honestly whether it is finished. The useful check is coil alignment — turns lying side by side, tag locked at the upper edge, not running off along the standing line. The real tradeoff is range. Take it to stiff heavy leader and it will simply refuse to close, which is the material talking, not your hands.
What actually makes it fail
- Line too stiff or too heavy to collapse, so the coil never truly seats.
- Turns stacking over each other rather than lying adjacent, which puts the load on one crossing.
- The tag missing the top loop on the return, producing a coil with nothing locking it.
- Jerking it tight, which both burns fluorocarbon and stops the coil traveling as one package.
- Trimming before the pull test, so an unseated coil goes fishing unnoticed.
How to test it, and how it ages
Wet it and pull slow and steady rather than sharp. What you are waiting for is the coil to travel and collapse onto the eye in one movement — you can feel it, and it is the confirmation the knot is done. Then look: even adjacent turns, tag locked at the top edge, nothing standing off along the standing line. Load it firmly against the standing line before you fish it. If the coil is still loose or sitting proud of the eye, cut it off; a Pitzen that has not collapsed is not a Pitzen.
Over a session: Good over a session once it has fully seated, since a collapsed coil has little room left to move. A partly seated one gets worse with every cast, so the check on the first tie matters more than any later inspection.
Troubleshooting
Why will it not close on my leader?
The line is too stiff or too heavy. That is the knot’s hard limit — move to the San Diego Jam for heavier line rather than fighting it.
Why do my coils end up on top of each other?
You are wrapping too tight or letting the turns crowd. Keep them loose and adjacent, then let the seating pull tidy them.
How do I know it actually seated?
You feel the coil arrive as one package against the eye. If it crept down turn by turn, it did not seat properly.
Why does it break on fluorocarbon?
Dry or sharp cinching. Wet it and pull slowly — the collapse needs the lubrication as much as the line does.
Is the Eugene Bend a different knot?
No. Eugene Bend and 16-20 Knot are other names for this same knot.
FIELD OBJECT
This one should leave the page.
The article is the long version. These are the pieces worth carrying into the next trip.
The 30-second version
On light tippet the Pitzen tells you when it's done: the coil drops onto the eye in one piece and you feel it land. Put it on stiff heavy leader and it just won't close.
What to watch
- Find the top loop before you start wrapping
- The lock sits above the coil, not beside the eye
- Loop first, then wrap away from the eye
- Seat check
Field card
- Pass the line through the eye and bring the tag back up alongside the standing line.
- Hook the line over a fingertip to hold a small loop at the top, away from the eye.
- Wind the tag back down around both parallel lines, about four turns, working toward the eye.
- Pass the tag back up through the small loop still sitting on your fingertip.
- Moisten it and tighten the coil onto the standing line, then slide it down to the eye with your fingers rather than…
RIGHT TOOL, NEXT
Knot Analyst
Carry the connection problem into a knot choice built around line, hardware, conditions, and failure mode.