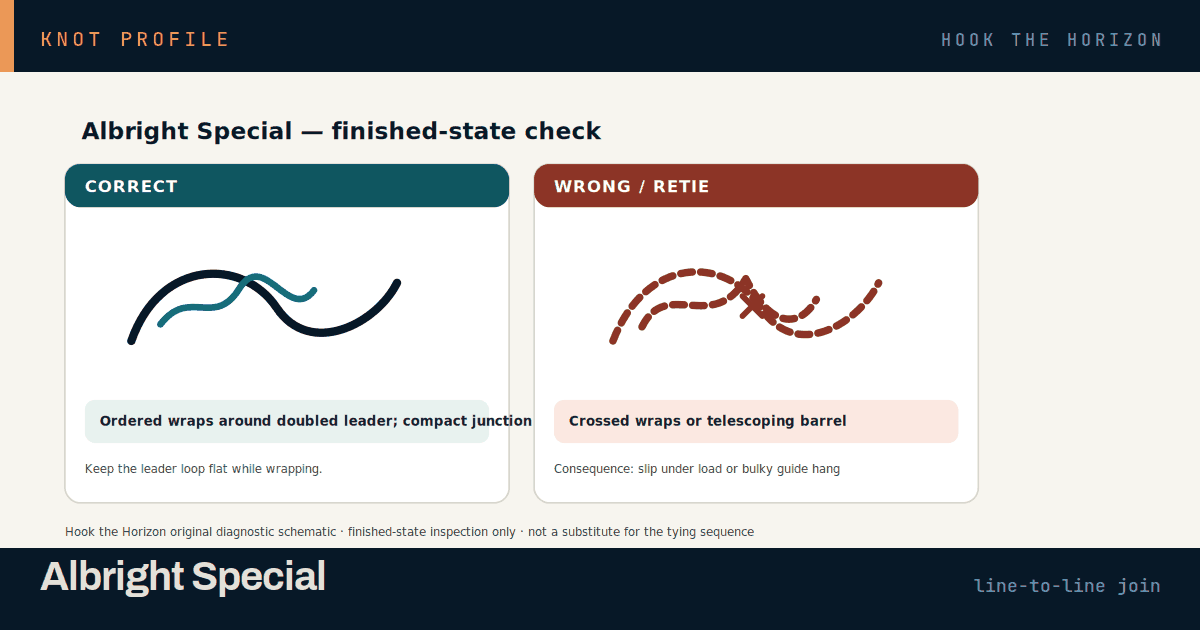
ORIGINAL HOOK DIAGRAM
Keep the wraps on the doubled heavy line and the exit on the same side.
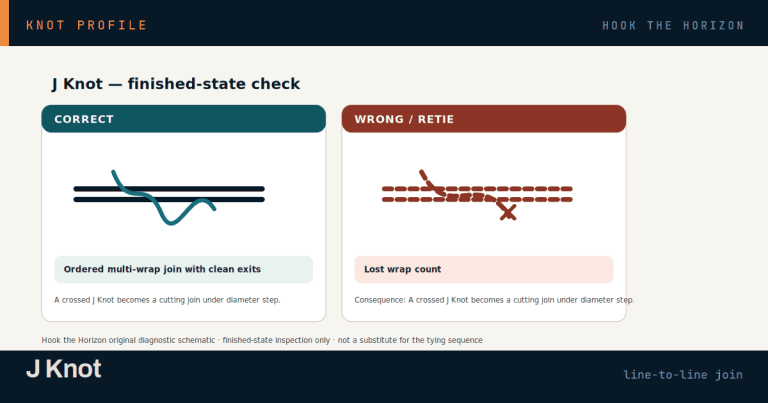
Original Hook the Horizon schematic. I keep the line roles and same-side exit labeled directly so the diagram still reads even in grayscale.
Best jobJoining very different diameters or materials — backing to fly line is where I use it most, plus a handful of leader systems.
Structural key
The heavy material only gets doubled into a loop. Every bit of wrapping falls to the lighter line.
Critical exit
The lighter tag exits the heavy-line loop on the same side it entered. Same rule as the Alberto, different wrap path to get there.
Failure clue
If the wraps slide off the end of the heavy loop, the knot wasn’t under control while it seated. It usually happens mid-tighten, when the standing lines outrun your fingers.
UNEQUAL MATERIALS NEED DIFFERENT JOBS
The heavy line only has to hold a fold. Everything else falls to the light one.
The Albright earns its keep when asking both lines to make the same knot would be awkward, or just wouldn’t hold. The thicker or stiffer material gets folded into a loop and basically just sits there. The lighter line does all the actual work. That split of jobs is what lets the connection handle a real diameter difference without needing both materials to behave the same way under wraps.
I’m careful with the phrase “works with unequal lines,” because that’s not the same claim as “works with every unequal-line combination I could throw at it.” Coating, stiffness, diameter, and whether the knot has to cross guides all still matter, every time.
Six steps, and the heavy line barely moves
- Form a loop in the heavier line or material.
- Pass the lighter line through the loop and leave enough tag to make the wraps.
- Wrap the lighter line around itself and both legs of the heavy loop in smooth, close turns.
- Bring the lighter tag back through the heavy loop and exit on the same side it entered.
- Pull the standing parts gradually while you work the wraps toward the end of the heavy loop, without letting them spill off. Losing the whole set off the end happens to everyone at some point, me included. Strip it and start over instead of trying to nurse it back on — I’ve wasted more time trying to save a bad one than it would’ve taken to just retie it.
- Lock the knot with a firm pull, inspect, then trim.
WATCH + VERIFY
An animation shows the same-side exit better than a still picture can.
Orvis — Albright animation · NetKnots — Albright animation and steps
Worth a rewatch any time it’s been a while, especially if you tie Albertos more often and your hands want to add the return wraps. Watch the exit side closely — that’s the one detail that’s easy to fake past yourself.
Open the deeper knot workflowJob, material, route, dressing, seating, pull-test checks and the standardized comparison record.
THE SIX-MOVE CHECK
Job → Material → Route → Dress → Seat → Test
- Job. Name what the connection has to do before choosing the knot.
- Material. Confirm the line, leader, rope, wire, and hardware actually suit this structure.
- Route. Trace every pass before tightening anything.
- Dress. Put strands, wraps, and loops in their intended order with no accidental crossings.
- Seat. Tighten in the order this knot needs. More force does not repair bad geometry.
- Test. Inspect the finished shape, load it by hand when appropriate, and retie if anything moves or fails the article-specific checks.
Practice / pass test. Tie this knot three clean times without rushing. A tie passes only when it matches this article’s What to check before you trust it geometry, shows none of the listed failure clues, and survives the stated load/inspection test. If you cannot tell why one attempt is better than another, keep practicing—the lesson is recognition, not memorization.
KNOT SPEC
Albright Special — the short answers
- ALSO CALLED
- Albright Knot, Albright Special. Credited to Florida guide Jimmie Albright, though the attribution is traditional rather than documented. Best known among fly anglers for backing-to-fly-line joins and among offshore anglers for shock leaders.
- KNOT TYPE
- Line-to-line knot — light line wrapped around a folded loop of the heavier material
- WHAT IT CONNECTS
- Joins two lines of very different diameter or material: backing to fly line, braid to heavy mono or fluorocarbon shock leader, mono to wire. Not a terminal knot and not for two lines of similar size.
- LINE TYPES
- Mono, fluorocarbon, braid, fly line and dacron backing, and single-strand wire at the heavy end. It slips when the two materials are too close in diameter, and on slick coated fly line if the wraps are not packed tight.
- STRENGTH BAND
- Solid. Reliable for the job it is built for — a large size mismatch — but it sits below the FG and a good Alberto on braid-to-leader, and it is the oldest structure in this group. Test rankings for these knots vary widely.
- DIFFICULTY
- Intermediate. The wrapping is easy; controlling the wraps while they seat is not. Kids can learn it with heavy line and a fat loop, where the structure is easy to see.
- STEPS AND WRAPS
- Six moves. Ten to twelve close wraps of the light line around both legs of the heavy loop is the usual count, with a few more when the light line is thin braid and a few less on fly line.
- TIE TIME
- A home knot more than a boat knot. A minute or two, and it seats better on a stable surface. Most anglers build backing-to-fly-line joins at the bench, not on the water.
- POOR CONDITIONS
- Fair. It can be set down mid-tie without unraveling, which helps, but the seating stage needs control and two steady hands. Cold hands and chop make wraps spill off the end of the loop.
- THROUGH THE GUIDES
- Bulkier than an FG or Alberto and it has a shoulder where the wraps end, so it can tick and hang on small guides. Acceptable when it lives outside the tip on a fly reel; a poor choice when a long leader must cross the guides on every cast.
- LUBRICATION
- Yes. Wet it before seating. Dry wraps of thin line packing down onto heavy mono generate heat, and it is the light line that pays for it.
- TAG END
- Trim the light tag close but not flush, roughly an eighth of an inch, and the heavy tag as short as you can get it. Some anglers coat the finished knot to smooth the shoulder for guide passage.
- TOOLS
- None required. Nippers to trim. Pliers help pinch heavy mono into a tidy loop, and a drop of flexible knot coating is genuinely useful on backing-to-fly-line joins.
- BEST SUITED TO
- Fly fishing across the board for backing to fly line, plus offshore and surf shock-leader work — tarpon, sharks, kings, big surf species — wherever a light main line meets a much heavier trace.
The strength bands are rough on purpose. Published knot tests don’t agree with each other — the same braid-to-leader knot has tested near ninety percent of line strength on one machine and under half on another, because the line brand, its diameter, how fast it got cinched, whether it was wet and whose hands tied it all move the number more than the knot does. Use the band to compare this knot with the others, not as a number to quote.
WRAPS CAN SLIDE OFF
It joins braid to backing, mono to wire, almost anything to anything, because the heavy side only has to hold a fold. The wraps can also walk off the end of that fold while you seat it, and nothing warns you first.
Advantages
- Handles extreme size mismatches that most line-to-line knots cannot manage.
- The heavy line only has to hold a fold, so stiff or coated material does not have to be wrapped.
- Works across dissimilar materials: braid to mono, backing to fly line, mono to wire.
- Simple structure, easy to trace by eye and to learn from a diagram.
- Long-established and well understood, so instructions everywhere agree on the shape.
Disadvantages
- The wraps can slide off the end of the heavy loop while seating, ruining the knot with no warning.
- Bulkier than modern braid-to-leader knots and it leaves a shoulder that catches guides.
- Beaten by the FG and Alberto on braid-to-leader specifically, where it is now the dated choice.
- Needs a genuine size difference; on similar diameters it slips.
- The seating stage is fussy enough that it is a poor knot to build in rough water.
Use a different knot when
- FG Knot — when braid meets leader and the connection has to run through the guides
- Alberto Knot — when you want the same folded-loop idea with better grip on braid and a slimmer finish. The line between the two is mostly diameter gap, which I take apart in the braid-to-leader comparison.
- Double Uni — when the two lines are close in diameter and neither needs to be the wrapping line
- Bimini and a loop-to-loop — when joining fly backing to fly line and you want a join you can break down later
WHAT TO CHECK BEFORE YOU TRUST IT
The Albright is at its best where the size gap is extreme and no other knot is comfortable: light backing to coated fly line, or a thin main line to a heavy shock trace. Watch one thing while it seats — the wraps must be walked toward the closed end of the heavy loop without spilling off it, and if they spill, the knot is finished and gets cut. The tradeoff is honest: for braid-to-leader work the FG and Alberto have overtaken it on profile and grip, so it survives mainly where the mismatch is too large for them.
What actually makes it fail
- Wraps sliding off the end of the heavy loop during seating.
- Loose, crossed or spread wraps instead of a tight close-packed set.
- The light tag exiting the heavy loop on the wrong side, leaving nothing to lock the wraps.
- Used on two lines of similar diameter, where it has no grip to work with and slides.
- Seated dry, so the light line burns where it turns over the heavy loop.
How to test it, and how it ages
Look at the wrap set before you load it: close, even, all lying on both legs of the heavy loop, with the light tag exiting the same side it entered and the whole set sitting back from the open end of the loop. Wet it, then pull the two standing lines apart steadily and firmly. A good one locks and holds its shape; a bad one lets the wraps shift along the loop. Then run your fingers over the shoulder — if it catches your skin it will catch your guides.
Over a session: Stable over a session and over a season on a fly reel, where it rarely moves. On a spinning rig, check the shoulder and the light tag after casting, because that shoulder is where wear and weed collect.
Troubleshooting
Why do the wraps slide off the end?
You are pulling the standing lines faster than you are walking the wraps down. Seat it slowly, keeping a finger on the wrap set until it is snug against the loop.
Why does it slip on braid to leader?
There is not enough of a size gap, or the braid was not wrapped tight enough to bite. For braid to leader, the Alberto or FG is the better modern answer.
Is this the same as the Alberto?
No, though they are related. The Alberto adds a return set of wraps back over the first. If you cannot tell which you tied, cut it and retie.
Why does it hang up in my guides?
The shoulder where the wraps end. Trim the tags shorter, and consider a flexible knot coating over the join on fly gear.
Why did my fly line break at the knot?
Wraps too tight into soft coating, or seated dry. Ease off, wet it, and let the wraps grip the loop rather than crush the line.
FIELD OBJECT
This one should leave the page.
The article is the long version. These are the pieces worth carrying into the next trip.
The 30-second version
The Albright folds the heavy line and makes the light one do every wrap, which is how it handles size gaps other knots can’t. Watch the wraps while it seats. They love to spill off the end of the loop.
What to watch
- Keep the wraps on the doubled heavy line and the exit on the same side.
- The heavy line only has to hold a fold. Everything else falls to the light one.
- Six steps, and the heavy line barely moves
- Albright or Alberto?
Field card
- Form a loop in the heavier line or material.
- Pass the lighter line through the loop and leave enough tag to make the wraps.
- Wrap the lighter line around itself and both legs of the heavy loop in smooth, close turns.
- Bring the lighter tag back through the heavy loop and exit on the same side it entered.
- Pull the standing parts gradually while you work the wraps toward the end of the heavy loop, without letting them spill off.…
RIGHT TOOL, NEXT
Knot Analyst
Carry the connection problem into a knot choice built around line, hardware, conditions, and failure mode.